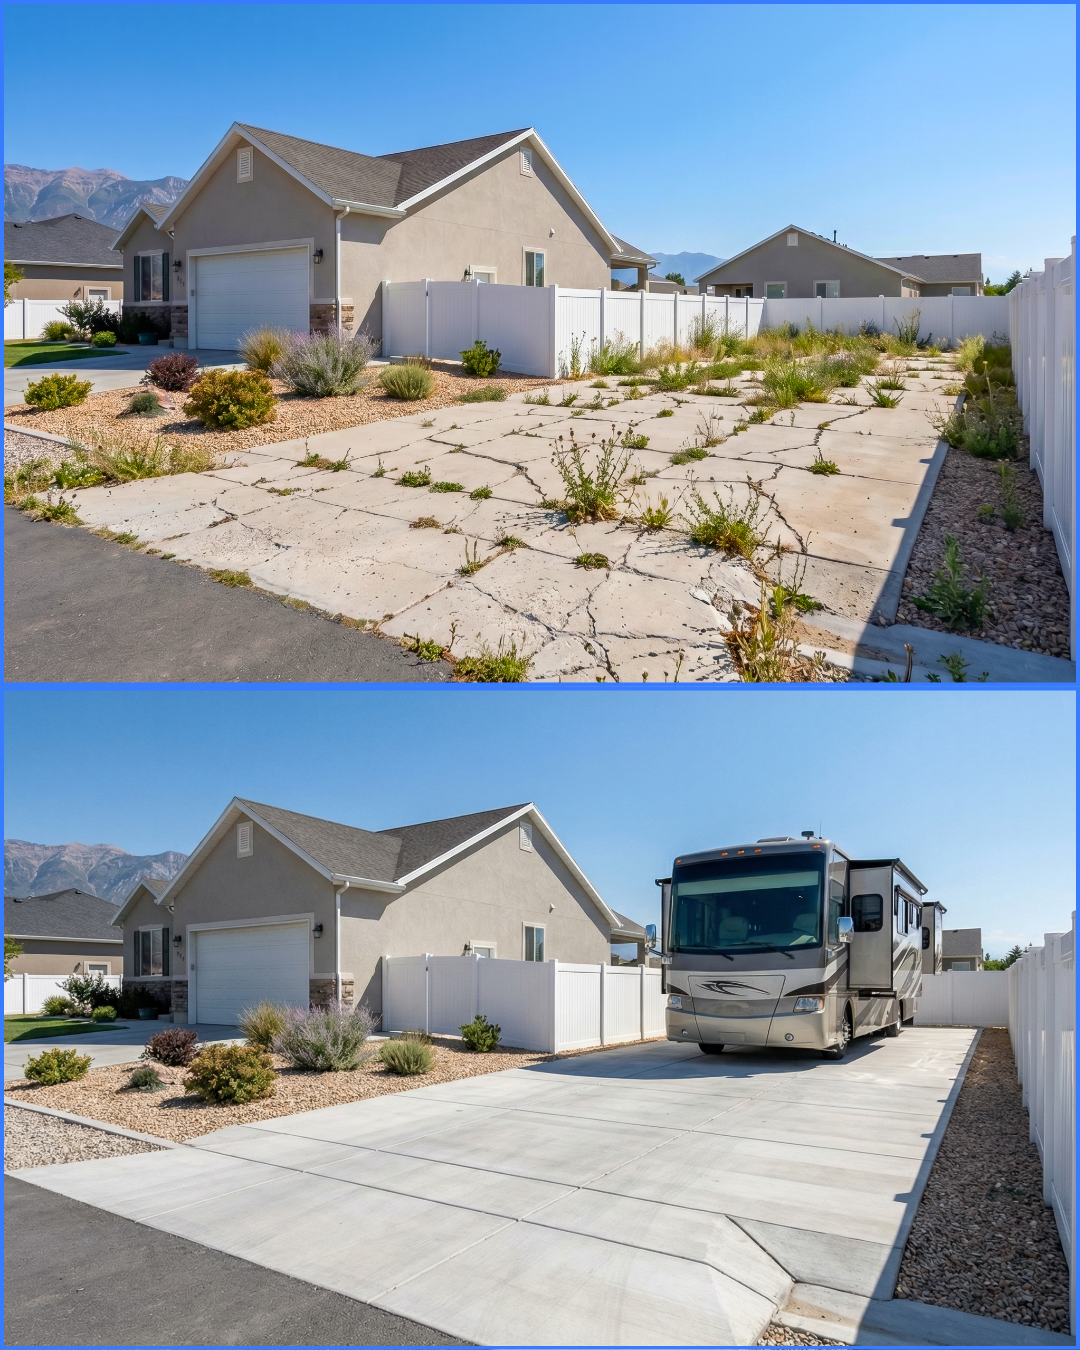
RV Pad Installation for Utah Homeowners: Cost, Size & Build Process
Quick answer: A standard RV pad in Utah runs $8–$14 per square foot installed, with most homeowner pads landing between $3,500 and $9,500 total depending on size and access. Pads need 6–8 inches of concrete (vs 4 for a driveway) on a properly compacted base, with rebar reinforcement and a slope away from the house. Built right, the pad lasts 30+ years through Utah’s freeze-thaw without cracking under a loaded coach.
If you own an RV in Utah and you’re tired of parking it on grass, gravel, or a too-thin section of your existing driveway, a dedicated concrete RV pad is one of the higher-leverage projects you can do for the property. It eliminates the seasonal mess, protects the rig, often increases home resale value, and — if you build it right the first time — you never have to think about it again.
But RV pads are not just “a regular driveway extension.” A loaded Class A motorhome or a fifth wheel with full water tanks can hit 30,000 pounds. That kind of static load on Utah soil through a freeze-thaw winter will crack a 4-inch driveway pour without rebar in under five years. Here’s how to do it right.
Sizing the Pad for Your Rig
The first mistake we see is undersizing. Homeowners measure the RV and pour exactly that footprint — then realize they have nowhere to step out the side door, no room for slide-outs, and no clearance to walk around the back to hook up sewer.
Realistic minimum dimensions by RV type:
| RV Type | Typical Length | Recommended Pad Size |
|---|---|---|
| Travel trailer (small) | 16–22 ft | 12’ x 30’ (360 sq ft) |
| Travel trailer (large) | 22–32 ft | 12’ x 40’ (480 sq ft) |
| Fifth wheel | 30–42 ft | 14’ x 50’ (700 sq ft) |
| Class C motorhome | 22–32 ft | 12’ x 40’ (480 sq ft) |
| Class A motorhome | 30–45 ft | 14’ x 50’ (700 sq ft) |
| Toy hauler with garage | 32–44 ft | 14’ x 50’ + ramp clearance |
Width should be at least the rig width plus 4 feet — 2 feet on each side for slide-outs, awning shadow, and walking room. Length should be rig length plus 6–8 feet for hitch clearance, sewer hookup access, and getting in and out of the truck if you tow.
If you have an existing driveway and you’re extending it for the RV, plan the pad to either match the driveway width seamlessly or bump out as a dedicated parking ear. Both look intentional. A 6-inch overhang on one side reads like a measurement mistake.
Why RV Pads Need More Concrete Than Driveways
A standard residential concrete driveway in Utah is poured at 4 inches thick, 4,000 PSI mix, with optional fiber or rebar reinforcement. That spec is sized for a 4,000–7,000 lb passenger vehicle.
Now compare to actual RV weights:
| Vehicle | Typical Loaded Weight |
|---|---|
| Sedan | 3,500 lbs |
| Half-ton truck | 6,500 lbs |
| Three-quarter-ton truck loaded | 9,500 lbs |
| Travel trailer (loaded) | 7,000–10,000 lbs |
| Fifth wheel (loaded) | 14,000–20,000 lbs |
| Class A motorhome (fueled, full water) | 22,000–36,000 lbs |
The kicker: that load isn’t spread evenly. A fifth wheel sits with most of its mass on two axles concentrated under the pin box and trailer wheels. A Class A with leveling jacks down concentrates load through four small contact points the size of dinner plates. The point load on the slab is significantly higher than a driveway is designed to handle.
The right RV pad spec for Utah:
- Thickness: 6 inches minimum for travel trailers; 7–8 inches for fifth wheels and Class A motorhomes
- Concrete strength: 4,000 PSI minimum; 4,500 PSI is better
- Air entrainment: 5–7% — required in Utah for any exterior pour to handle freeze-thaw
- Reinforcement: #4 rebar on 18-inch centers in both directions, or #4 on 12-inch centers under the leveling jack zones for Class A coaches
- Base: 4–6 inches of compacted 3/4-inch road base over compacted native soil
- Slope: 1/8 to 1/4 inch per foot away from the house and any structures
- Control joints: Sawcut every 10–12 feet to control where cracks form when (not if) the slab moves
Cutting corners on any of those will show up within 5 years — usually as a crack running diagonally from the corner closest to the rig’s heaviest load point. We have a deeper breakdown of why thickness matters if you want the underlying physics.
What an RV Pad Actually Costs in Utah (2026)
Real Salt Lake Valley pricing for the spec above:
| Pad Size | RV Type | Standard Pad (Broom Finish) |
|---|---|---|
| 360 sq ft (12’ x 30’) | Small travel trailer | $2,900–$5,000 |
| 480 sq ft (12’ x 40’) | Large trailer / Class C | $3,800–$6,700 |
| 600 sq ft (14’ x 43’) | Standard fifth wheel | $4,800–$8,400 |
| 700 sq ft (14’ x 50’) | Class A / large fifth wheel | $5,600–$9,800 |
| 900+ sq ft | Class A + truck pad | $7,200–$12,600 |
Common add-ons:
- Tearout of existing surface: $2–$4/sq ft for old concrete; $1–$2/sq ft for gravel or grass
- Site grading or fill: $300–$1,500 for a level pad on a sloped lot
- Stamped or colored finish: +$3–$8/sq ft (rare on RV pads — the rig sits on it most of the time)
- Concrete approach apron tying to existing driveway: $400–$1,200
- Sewer cleanout or 30/50 amp electrical conduit pre-stub: $250–$800 if installed during the pour (worth it; retrofitting later costs 3x)
- Curb or low retaining wall on one or two sides: $40–$80/linear foot
For comparison with a standard driveway, see our Utah concrete driveway cost guide. Same per-square-foot range, different thickness spec.
Permits, Setbacks & HOAs
Most Utah cities require a building permit for an RV pad if it exceeds 200 square feet or attaches to an existing driveway. Salt Lake City, Sandy, West Jordan, Draper, and Saratoga Springs all have variations on this rule. A reputable contractor pulls the permit; check that yours does, not you.
Setback rules to verify before pouring:
- Side property line: typically 3–5 ft minimum from the pad edge
- Rear property line: typically 5–10 ft
- Front of house: some cities cap how far forward of the house line a parking surface can extend
- Total impervious surface: some HOAs and cities limit total hard surface as a percentage of lot area
HOA rules are the tighter constraint in newer Utah subdivisions. Many HOAs in Daybreak, South Jordan, Eagle Mountain, and Saratoga Springs explicitly prohibit RV parking or require it to be screened from street view. Check your CC&Rs before quoting the project.
Drainage, Slope & Common Layout Mistakes
An RV pad needs to shed water effectively. The pad is large, flat, and almost always located somewhere water has historically just absorbed into the soil. Get this wrong and you create a swamp on one side of your house.
The common mistakes:
Sloping Toward the House
Always slope away. 1/8 to 1/4 inch per foot is standard. On a 50-foot pad, that’s 6 to 12 inches of fall from the high end to the low end — which means the contractor needs to dig the high end deeper or build up the low end. Skipping that step to save labor flattens the slope and routes water at the foundation.
No Outlet for the Water
The pad has to drain somewhere. If the low edge dumps water onto a fence line, your neighbor’s yard, or a flat lawn that already pools, you’ve just created a new drainage problem. Plan the discharge before you pour: either grade to a swale, install a French drain, or route to a street curb cut.
Ignoring the Slope of the Existing Driveway
If you’re extending an existing driveway for the RV pad, the slope of the new pad has to play nicely with the old one. Mismatched slopes create a crown or trough at the joint that holds water and accelerates joint failure.
Forgetting the RV Door Side
Sub in 4 inches of crushed gravel or pavers along the door side of the pad to handle muddy step-out water and chair feet. Saves the lawn from getting beaten down where everyone enters and exits the rig.
Build Process & Timeline
For a typical 480–700 sq ft RV pad with no major site work, expect about 4 to 6 days on site:
- Day 1: Layout, excavation to grade, debris haul-off
- Day 2: Compacted gravel base, forms, rebar grid, any conduit or sewer pre-stubs
- Day 3: Pour, finish, sawcut joints (sometimes day 4 depending on cure speed)
- Days 4–7: Cure (no parking the RV yet)
- Day 7–10: Light vehicle use okay; full RV use waits until day 14
Add 1–2 days if there’s major fill, retaining wall, or drainage work. The right window in Utah for an RV pad pour is May through early October — warm enough to cure properly, dry enough to keep the schedule on track. Read more on when to pour concrete in Utah.
Bundling the RV Pad With Other Outdoor Projects
If you’re already mobilizing a concrete crew, the cost-per-square-foot drops significantly when you add other concrete or hardscape work to the same job. The crew is already on site, the equipment is already rented, the cleanup is already planned. Common bundles that save real money:
- RV pad + driveway extension or replacement — one pour day, lower per-sq-ft rate
- RV pad + sidewalk to side gate — same crew, same finish
- RV pad + back patio — if both are in the rear yard, frame them in one mobilization
- RV pad + landscape regrade — the excavator is already on site for pad grading; cheap to handle the rest of the yard
- RV pad + privacy fence — the fence post holes can be dug while the concrete cures
For a fuller list of bundle ideas, see our backyard transformation post.
How to Pick the Right Contractor
Not every concrete contractor builds RV pads correctly. The most common shortcut is pouring a 4-inch slab with no rebar, charging driveway prices, and calling it an RV pad. That slab will crack within 5 years under any rig over 12,000 pounds.
Questions to ask before signing:
- What thickness do you pour for a fifth wheel / Class A?
- Are you including rebar, and what size and spacing?
- What PSI mix and what air entrainment percentage?
- How are you handling the slope and water discharge?
- Are you pulling the permit, or am I?
- What’s your warranty on cracking from sub-base failure?
A contractor who hesitates on any of those answers is the wrong contractor for an RV pad. For a deeper guide to vetting any concrete contractor, see how to choose a concrete contractor.
Our Take
An RV pad is one of the few outdoor concrete projects that pays for itself directly — in saved storage fees, a cleaner side yard, and better resale value when you sell the home. But it’s also one of the easiest projects for a budget contractor to under-spec and over-charge for, because most homeowners don’t know the difference between a 4-inch and a 6-inch pour until the slab cracks four years later.
Build it right once: 6–8 inches thick, properly reinforced, properly sloped, properly drained, on a properly compacted base. The price difference between a budget pad and a quality pad is often less than $1,500 on a 600 sq ft pour — and that money buys an extra 20+ years of life on the slab.
Need an RV Pad Built Right?
We pour RV pads across the Salt Lake Valley sized for travel trailers up through Class A coaches. Free walkthrough, written quote, permit included.
Get Your Free Estimate